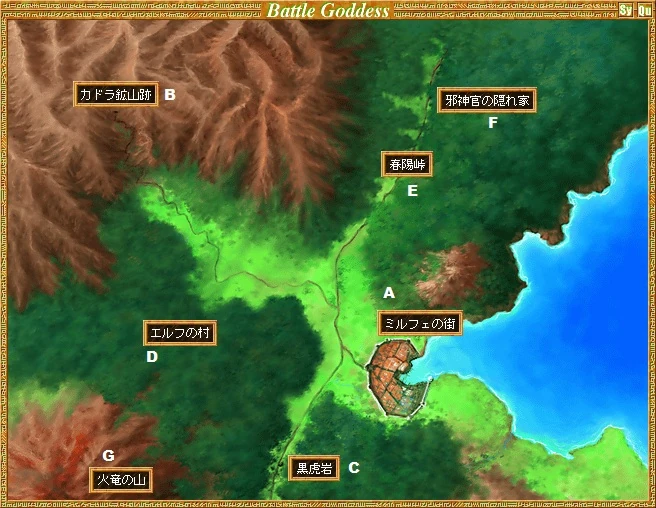
Map:
- A: the town of Milphe
- B: the abandoned Cadora mine
- C: Black Tiger Rock
- D: the Elf Village
- E: the Springtime Pass
- F: temple of heretics
- G: the mountains of firedrake
Getting Started[]
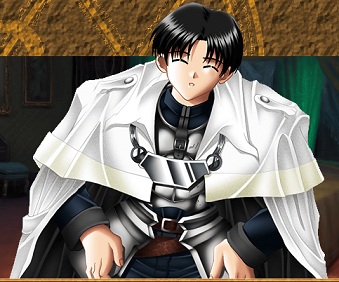
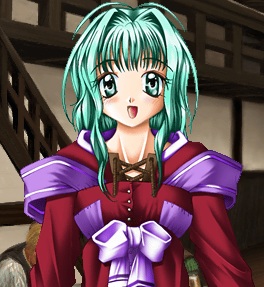
The game begins as Celica and Suri arrive at the town of Milphe, several days behind schedule. At the start, there isn't much to do except walk around and talk to people while the backstory is established.
After your initial confrontation with Revia in the town square:
- Go to the Bison's Hoof Inn to meet Rinsha and get a room
- Go to the lord's manor (now a temporary headquarters for the Rewinian soldiers) for a briefing on your mission, courtesy of Revia
- Check out the militia headquarters and break up a fight between Carla and one of Ranzov's men
- Head back to the Bison's Hoof and go to sleep
The first night, Celica has a dream in which he sees a local father and daughter attacked by the Black Foxes, a company of bandits. In the morning, he discovers the dream to have been a foretelling: the wounded father Rand has stumbled back to town, but the daughter Alicia has been taken. Bureaucracy prevents Revia from taking action, so Celica resolves to go to the bandit hideout himself.
On the map, two locations are available - the abandoned Cadora mine in the northwest, and the bandit's base at Black Tiger Rock in the southern forest. Although you can go to the mine on the first day, Celica will automatically warp back to town once you reach the stairs down to the second level, then will not enter it again until the next day. If you try to sleep without rescuing Alicia, Suri will come to your room to try and convince you otherwise; you'll be given the option of listening to her or going to sleep anyway.
Black Tiger Rock / Black Foxes' Hideout[]
This dungeon will serve as an easy warmup for the rest of the game.
A lone Brigand guards the cave entrance.
In the hideout's first level, you'll meet a group of three Brigands, followed by a lone Brigand.
The chest east of the second level's stairs holds a Recovery Water (Large). Heading the other direction brings you to another group of three Brigands, followed by a rather larger fight when you find what they've been up to with Alicia:
- BOSS: Matisse, Brigand (x4)
- This boss, like most of the others in the game, is pretty simple. Kill off the Brigands first, then spend a couple more turns wearing down the bandit leader. You may need to chug down a Recovery Water or two to get through the fight in one piece, but so long as you keep Celica's health in the mid-teens, you should have little trouble. Matisse drops a Lamera Armor when you kill him.

Once Matisse is dead, you're free to bring Alicia back home again. The storeroom where she was held contains a Gust Ring and 360 shillings. Following this, you'll be able to resume exploring the mine as originally planned.
NOTE: If you waited until the second day (or later) to clear this dungeon, you'll fight Matisse and his cronies in the previous room in place of the three Brigands; when you break into the storeroom, you'll discover that Alicia has died.
The Abandoned Cadora Mine[]
As mentioned above, if you enter the mine on the first day it's available, Celica will decide to wait for the Rewinian soldiers before proceeding beyond the first floor. On the second day, Revia and her men will be waiting for you at the mine entrance, and you'll be ready to explore the mine in earnest.

Mine, 1F[]
Roughly half of this level will not be accessible until later, as a large fissure prevents you from crossing.
There isn't much of interest here now; west of the entrance you'll find a sealed door, behind which you can sense a powerful demonic presence. There's also an old freight elevator for moving ore, but it can't be operated without a key.
Scattered about the floor are a Recovery Water (Small), a Liera Leaf, and a Badier sword.
Mine, 2F[]
Like the first floor, this one has a large hole in the middle; however, this one has a narrow ledge along it.
If you head past the bridge instead of crossing it, you can pick up a Recovery Water (Large). You'll eventually come to a set of stairs in the southeast. These lead up to an otherwise-inaccessible room on 1F where you can find a Goddess Droplet and a Heavenly King Stone.
Revia is waiting for you at the edge of the gap, trying to figure out how to get across more quickly; a section of the floor gives way, and Celica is barely able to catch her, much to her dismay. The rest of her force makes its way across using the ledge.
The path splits on the other side of the hole. Heading west from the large hole nets you two Recovery Waters (Small) and a Cold Talisman. If you head north, you'll find a Lendein Grass and a magic Incense, as well as a section of mine which has been taken over by orcs. There are a number of groups of mixed Orcs and Orc Mages in this area; target the mages first, and keep your health in the 20s or higher as you travel so that you don't get Fireballed to death before you can react. The orcs are guarding a number of treasure chests - among the spoils are 800 shillings, a Venus Stone, and a Saturn Stone. In the northeast corner is a larger group consisting of three Orcs, an Orc Mage, and a Troll. You may want to use that Cold Talisman you picked up earlier to save on time and reduce damage taken. The chest behind them contains a Troll Ring.
Once you've cleared out all of the orcs, heading south from the pit will bring you to the elevator we saw before, as well as the stairs down to the third level.
Mine, 3F[]
As soon as you'll enter this floor, there'll be a cutscene where one of the soldiers meets a spirit resembling Princess Latina. Revia is waiting for you near the stairs; and informs you that several of her men have gone missing, and that you should continue searching for the princess while she looks after her unit.
This area is sort of a waterway or cistern, with canals roughly dividing it into four quadrants. You start in the southeast, and will need to work your way north, west, and then south to the southwest corner, where the stairs leading down are.
The southeast quadrant has chests containing Plate Mail and a Sea King Stone.
The northeast quadrant has Combat Incense and a Jupiter Stone. There's also a locked gate at the east edge of the map with a sign warning you of a griffin infestation.
In the northwest you'll find a Recovery Water (Large).
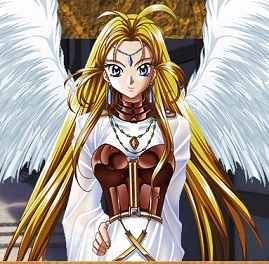
The island in the center is largely unremarkable, except for one hallway which contains some sort of odd distortion that keeps returning you to the entrance. You can get to the end if you avoid the (invisible) warp spaces - just go two spaces up the side, then two spaces up the middle, then two up the side, two up the middle, and so forth. At the end you'll meet an angel, apparently a forgotten low-ranking servant of one of the old gods. It appears to have no mind of its own, and attacks Celica when he doesn't identify himself.
- BOSS: Apsael
- The angel's attacks aren't dangerous, but her high defense means that it'll take a while to wear her down, so you'll probably have to heal once. She drops a Qu'ran when she's defeated.
The chest Apsael was guarding contains a Iurun sword.
The southwest and final quadrant contains a Touch of Ilune.
As you cross the bridge into the southwest quadrant, you'll come to a place where Revia's knights are taking a breather. The apparition of Latina appears and rushes past before you can react, heading towards the mine entrance. Celica uses his earring to warp himself and Revia to the exit, but once again Latina slips past and makes for the town. Revia orders Celica to either stay behind, since the reports claim the Princess only attacks men; naturally, Celica comes to town anyway, claiming that he's simply heading to the inn. Instead, he heads down a back alley, knowing that the Princess will be drawn to his unique power - and sure enough, she attacks.
- BOSS: Ethereal Latina, Sweety (x2)
- The Princess' ethereal body is even less threatening than Apsael was, especially if you've equipped the sword the angel was guarding. In fact, you can probably auto-battle her without fear of dying.
Celica realizes that for the Princess to project an ethereal form, she herself must still be alive somewhere. Having subdued the enemy, he proceeds to drain her energy; in the process, he tries to trace her lifeline back to Latina's physical body. He gets as far as the Cadora Mine before hitting a powerful barrier, but he's still able to catch a glimpse of the unconscious Latina - some other force may be controlling her. This isn't quite enough to appease Revia once she realizes what Celica's done (and how he did it), and she stalks off to headquarters in a huff. Before following her, Refin hands Celica the key to the mine's freight elevator, on Revia's orders; the knight corps is too large to use it efficiently, so it may as well go to the Godslayer instead.
Mine, 4F[]
As soon as you enter the fourth floor of the mine (using either the stairs from 3F or the elevator), you'll see a scene where a woman receives orders to hold the Rewinian troops at bay. A short way into the level, you'll come to a spot where Revia's knights are locked in a standoff with other soldiers - other Rewinian soldiers, as it turns out, serving Lord Lorrain, onetime fiance to Princess Latina. The troops are commanded by Kachua, a Rewinian aristocrat and acquaintance of Revia's; it's uncertain exactly why she's here and standing against you. Ranzov states that these soldiers are traitors to the throne and should be cut down without mercy, but Refin intervenes by pointing out that even if it were true, the White Dragon Knights can't win the battle without severe casualties. Seeing that this is going nowhere, Celica sets off to find another way around.
Head back down the tunnel to where the purple corridor is visible, and examine the wall blocking the way. Once this is done, go back to Revia to ask for Refin's assistance in breaking the wall down. Once this is done, Celica is to scout out the new passage and see where it leads (but not before being lectured by Refin and Haishera about respecting Revia's feelings).
A short way in, you'll run into a group of three Lesser Demons; be ready for an extended fight, as these guys are quite resilient to attacks at this stage of the game. They're also capable of hitting for around 30 damage apiece (although most of their attacks are much weaker) so be prepared for emergency healing if you let your health get low.
Continue up the twisting corridor and you'll come to a second pack of three Lesser Demons, followed shortly thereafter by a third. Finally, a door will lead you out of the purple hallway and back into the tunnel. There are two sets of stairs here, one leading up and one leading down; the tunnel heading off to the southeast will bring you back to where the battle is raging. Kachua is surprised to see that both Revia and Celica have come to the mine, but refuses to offer any explanation for the betrayal beyond her dedication to seeing Lorrain and Latina reunited. Before withdrawing, she hints at the existence of a labyrinth beneath the mine.
The tunnels to the east of this room contain a Binding Salve, a Recovery Water (Large), a Magic Incense, and 600 shillings.
Head back to the northwest corner. The stairs leading up will eventually bring you to the previously-inaccessible section of 1F, where you can find a Mercury Stone, a Jupiter Stone, a Venus Stone, a Mars Stone, a Saturn Stone, a Heavenly King Stone, a Sea King Stone, a Flame Talisman, and a Savage God's Card. Quite a haul, especially considering that it's guarded by weak first-floor enemies.
Mine, 5F[]
The stairs leading downward will bring you to the mine's fifth level. Follow the tunnel to the first intersection. Heading south will bring you to two Recovery Waters (Large).
Going west from the intersection will bring you to a room where some of Lorrain's men are raping a female member of the White Dragon Knights. Celica intervenes, resulting in an easy fight with a Sorcerer, two Lv. 6 Rewinian Soldiers, and two Lv. 4 Rewinian Soldiers. Hoping to save his own neck, the last remaining soldier tries to bargain with information, telling you that there's a griffin's nest east of the waterway on the third level - he then makes the mistake of trying to take the woman as a hostage, which doesn't end well for him. Refin shows up and collects his captured comrade; Celica finds the key to the waterway on one of the dead soldiers' bodies.
Heading onward, you round a corner to run headlong into Kachua, who's trying unsuccessfully to rein in her troops. When the men with her realize that you've killed everyone who was up ahead, they attack, forcing Kachua to join in with them.
- BOSS: Kachua Klein, Lv. 4 Rewinian Soldier (x4)
- This is probably the first difficult boss fight in the game, largely due to the unpredictability of Kachua's damage. Her sword can do anywhere from 15 to 60 points of damage in a single hit, and if she immediately follows it up with a spell, you could lose half of your health before you're even able to respond. You may find it most effective to skip the soldiers and just focus on her until she's down before cleaning up the trash. Bring a stock of Recovery Waters with you. You'll receive Kachua's sword after the fight.
To Kachua's frustration, Celica spares her life, saying that Revia wouldn't like it if he hurt her. Realizing that she's far too weak to be treated as a serious combatant, she uses some sort of magic to teleport deeper into the mine and catch up with Lorrain.
In the tunnels beyond you can find a Mars Stone, and a Wand of Concealing Fog.
Mine, 6F[]
Taking the stairs down from 5F will bring up another scene. Kachua reports in to Lorrain, who waves off her apologies. She also notes that, compared to the power she's seen him use in the past, Celica seemed very weak while fighting her; she recommends that all their forces focus on defeating him while they have the chance. Lorrain, however, tells her to let the Rewinian detachment continue onward, trusting that the Labyrinth will thin them out long before they reach the Princess.
Here you'll encounter the first of many locked doors, the key to which you won't find until much later. South of the stairs is a chest containing a Dagger of Raging Flame, while the northwest corner holds a staircase leading down to Orvid's Palace, an optional area. Revia and company are stalled (yet again) to the east, where some kind of magical barrier is holding them back. Celica decides to head back to Milphe and see if any of the miners know anything about this.
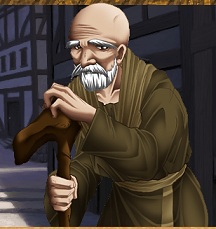
You'll have to head back to town manually; it'll be night when you arrive. Rinsha greets you when you go back to the inn, and Celica asks her if she knows anybody who worked the mine in the old days; she tells you that old man Zenn in the back alleys should have some stories to tell, but advises you to wait until morning to do so. Spend the night, then head to the back alleys to meet with the old man. It turns out that he does know what you want, but it takes a good two hours of rambling (to Haishera's great annoyance) before he gets to the point: the miners encountered a similar barrier years earlier, and a traveling priest gave them a magical rod to dispel it. The rod has been in his family's possession ever since, but as it turns out, the old man's wife recently sold it at the bazaar because it was just gathering dust. Ignoring Haishera's suggestion to hit the old man, Celica heads back to the square.

Go talk to Groc at the bazaar; it turns out that he has the rod in question, but he's not willing to let such an item go so cheaply. However, if you've been paying attention, you've noticed Groc's interest in the griffin that flew overhead earlier. He wants to commission Celica to bring him the griffin's eggs, promising a considerable reward. Convenient that we've just received the key leading to the griffin's nest from an earlier encounter, yes?
Griffin's Nest[]
Make your way to the northeastern corner of 3F, and use your new key to open the door blocking your passage to the east. Stick to the northern tunnel first for a Sword Accessory, then head down and around to the nest itself. Around the nest are a Jupiter Stone and a Recovery Water (Large). Investigating the nest itself causes the griffin to return and attack.
- BOSS: Griffin
- The griffin is physically fairly resistant, but three or four good offensive spells should put it down easily enough. It doesn't hit all that hard, either.
The wounded griffin will try to flee once you've defeated it; you have the option of dealing the deathblow (first choice) or letting it go (second choice). If you kill the griffin, Celica will take all four of the eggs, since demons are certain to devour them anyway without the parent around to protect them. If you let it go, Celica will take only one, which is damaged, figuring that Groc was certain to try and hatch the egg anyway; Haishera teases him about how soft he's gotten since the old days. When you're finished, you can use the nearby exit to get straight to the map.
Once you return with the eggs, Groc will set about negotiating a price. After noticing the way the merchant treats his slave Saria, Celica suggests that Groc turn her over to him as payment - an option to which the merchant readily agrees. Saria is surprised by this, since she's clumsy and good-for-nothing, as Groc puts it; Groc hastily throws in the rod (the thing you wanted to buy in the first place!) to sweeten the deal before Celica can change his mind.
After the initial surprise, Suri takes Saria's arrival in stride and whisks her off to be cleaned up. Rinsha, on the other hand, is less than pleased that Celica's going around buying slaves; she settles for reminding him that he now owes her for three guests instead of two. Leave the inn and come back, and you'll see that Saria looks much better with a bath and some of Rinsha's old clothes. Celica asks Suri to show their new family member the ropes, then goes back to his mission.
Mine, 6F (eastern area) / Infernal Space[]
Return to the sixth floor of the mine. Celica will now be able to use the rod to dispel the barrier. Revia isn't around to see, so Celica gives Refin the rod afterward and tells him to take the credit. The tunnel widens out into a rather large cave, with lots of passages branching off it; most of these are dead ends. South of your position is a door that can't be opened from this side; the exit is in the northeast, and in the southeast corner is a chest with a Recovery Water (Large).
Travel through the northeastern exit into the eastern section of the sixth floor. Soon you'll come to another breakable wall like the one you encountered on the fourth floor, but much more interesting is the little room to the north. Examine the pedestal next to the magic circle, and Haishera will inform you that this is a gate controller; it will record your pattern and allow you to travel directly here from the entrance, saving you a great deal of hair-pulling on your return trips. From here, go down the only remaining passage to the little room with the soldiers in it, but make sure you have some healing items first; you won't be able to return to town for a little while.
You arrive to find Refin in a panic and Revia nowhere to be seen. Refin quickly leads you to a strange mirror in the wall, which Celica recognizes as a door that will only give passage to those with magical power. Apparently it only goes one way, as Revia found herself sucked through and hasn't yet returned. The news only deepens Refin's concern; with the general gone, command passes to Lord Ranzov, who is liable to take advantage of the situation if he realizes that she can't get back out again. Telling Refin to keep an eye on Ranzov, Celica steps through the portal after her.
Revia is on the other side, fighting off a group of demons and (as usual) not happy to see Celica. You help her fight off the group, consisting of a Scune, two Reinhards, and two Hell's Guardsmen. This will be your first time working with an NPC (unless you've been summoning Liliem or Irun); Revia is one of the more useful ones, as her area spells will destroy entire groups in one or two shots. More bickering ensues once the fight is over, and Revia's mood improves only slightly when Celica tells her that in his drained state, he now needs her help to get to the exit.
This area is a simple, yet annoying, maze - and your earring doesn't work here, so the only way to get back to town is the long way around. There's very little of real interest here, so if you find the stairs, don't worry about exploration. The stairs up from this initial area (7F) are in the northeast corner. In the second area (8F), there's a set of stairs just to the west of the ones you entered through; these lead to a dead end. Along the west wall are a pair of buttons; pressing both opens a door just to the south, leading to the stairs to the third area (9F). The stairs from here to the fourth area (10F) are visible when you enter. In the fourth area you'll immediately find a locked door, which you'll have to ignore until later. The passage to the north passes by a chest containing Resin Mail before going down a very long tunnel to the east. The room at the end contains, infuriatingly, four staircases. Counting from the north, the first and third are dead ends, the second leads to a Viral Sword, and the fourth leads you to the fifth area (9F again). From here the path becomes much more linear; just follow the hallway around and climb up to 8F, then continue down the passage to a rather ominous-looking enemy.
- BOSS: Narauk, Reinhard (x2)
- The same rules apply as for other bosses; although he doesn't hit as hard as some of the optional enemies you may have already faced, he can still do a chunk of damage quickly if your defensive power is low. He drops a Brauzaga when killed.
With that little bit of excitement out of the way, move on up the stairs to 7F. The purple stone gives way to bare gray rock here; you can head towards the exit to the east, but Celica will stop you, saying that he hears voices in the other direction. Go past another locked door to the west and take some more stairs up to 6F - at last, familiar territory. The path will immediately split several times; to the northeast is a chest containing two Thunder Talismans. Going south will take you on a long, meandering route to the northeast corner, where stairs will lead up to the Abyssal Space. However, no sooner do you step into this area than Haishera warns you to leave, as she can sense a powerful demon here that you'll have no hope of defeating. So instead, go back to 6F and head to the west, finally bashing down that thin wall we saw when we first arrived. The knights are there to greet you, and everyone's relieved - except, of course, for Ranzov.
Western Passage, 7F[]
Head to the stairs leading back down into the Infernal Space (you'll see an H-scene with Kachua and Lorrain along the way). Now head down the gray hallway to the eastern exit that Celica wouldn't take before.
At once you have another scene involving Kachua; tired of following her orders, her soldiers have lured her to an out-of-the-way area and sprung a trap, claiming that Lorrain gave them permission to use her for their sexual desires as they saw fit. Just as you come to the intersection in the hall, Celica walks in on them in the middle of their fun. He overhears them planning to surrender to Revia's men once they're finished, but he's having none of it, even when they try to offer him Kachua as a bribe. After an easy fight with six Lv. 6 Rewinian Soldiers, many more arrive, changing the playing field somewhat; their new plan is to kill Celica and present his head to Lorrain, claiming that he was Kachua's attacker. Unfortunately for them, Lorrain is right behind them, and once he takes stock of the situation, he wastes no time in burning them to a crisp. Celica realizes that in his current state, he won't stand a chance in a straight-up fight. However, Lorrain merely thanks him for rescuing his vassal, collects the barely-conscious Kachua, and leaves, pausing only long enough to promise that they will be enemies when they meet again. After he's gone, Haishera comments that Lorrain used a dark talisman to cast his spell, and Celica wonders if it was his devotion to the Princess that drove him to such power.
The next side passage contains three units of Vile Blade Coating, while the door to the north cannot be opened from this side. The three beams ahead of you are a special barrier that you will likely have no way of releasing yet; you'll have to return to town and wait for the time being.
Interlude: The Festival and Roca's Request[]
You'll have to wait in town until the festival begins, which means at least six days must have passed, and you must have swapped the griffin's egg for Saria. On the seventh night, you'll see a scene where the angel Ilzave goes to meet a trapped dark presence, who she addresses as one of the Ancient Gods. The dark presence taunts her, saying that with Ilzave being a traitor, they are equally dark. When Ilzave irritably asks why she was summoned, the presence informs her that the person who is key to its freedom will be coming soon. This news agitates the angel quite a bit, and she leaves, but the dark presence adds that in her state, there is nothing she can do to prevent it.
Celica awakens the next day to hear a racket outside; Suri reluctantly tells him that they're setting up for a festival in town. When Celica presses further, she elaborates that it's meant to celebrate the day one of the Old Gods was sealed away. That night before you go to bed, Carla will come to see you and ask that you not go to the mine the next day; since the militia has to help run the festival, they need some extra muscle in town in case something should happen. Saria doesn't understand what the big deal is; she's been to festivals before, but only as a commodity on the slave auction. Celica offers to take her and Suri out to enjoy the festival properly the next day.
On the day of the festival, you're free to wander the town and take in some unusual sights (Revia looking at dolls, Carla babysitting little kids, etc). After you've seen a couple of these scenes, an option to "just enjoy the festival" appears when you're in the square. Suri and Saria go off to get something to drink, and as soon as they're out of sight, Roca comes up to you; after confirming that Celica is strong, she says she needs to ask you for something. She doesn't get the chance, however. Ilzave appears in the sky above the town, warning the followers of the Old Gods to begone from the land at once, lest Marsterria's wrath raze the city to the ground. Celica finds it odd that a servant of the Old Gods would be in a New God's service, but the angel vanishes before he can give any reaction.
Afterward, Ilzave appears to Roca in the back streets and speaks with her briefly. Ilzave is impressed that a single priestess would be sent to investigate the mine - which, after all, has the Old Gods' power sealed away beneath it. The angel reveals to Roca that the swordsman from the town square (Celica) is likely connected to the Old Gods in some way; flustered, Roca tries to defend him, and Ilzave notes with some amusement that she's attracted to him. Letting that slide, Ilzave gives Roca one of her feathers and tells her to pass it on to Celica; he'll need it to proceed further into the mine, where he will be punished. Roca reluctantly agrees, but asks if she can make use of Celica's abilities first. Ilzave tells her to do as she pleases.
That night, Roca comes to see Celica at the Bison's Hoof (mistaking Suri's fear of her for fear of the angel's display during the festival). Here she reveals her request - that Celica come with her immediately to the Cadora Mine. A demon sealed away there is on the verge of breaking free, and she needs his power to help her drive it back.
One way or the other, you need that feather that Ilzave gave her. You have the option of refusing to help; if you do, Roca will attempt to seal the demon alone. She'll fail, and a couple of days later the possessed Roca will attack Celica in his room, forcing him to kill her in self-defense. The demon-possessed body will melt away, leaving only the feather behind.
On the other hand, if you do agree, she'll lead you to that sealed door right next to the entrance of 1F in the mines. She'll unseal the passage, allowing you to head west into Ermon's Palace.
Ermon's Palace[]
Heading all the way over to the west side will bring you to a teleportation circle; this brings you to a tiny room you have no way of exiting, so ignore it for now and head down the passage leading into the middle of the floor. Chests along the way contain a Binding Ointment, a Flame Talisman, a Magic Incense, and three Recovery Waters (Large). The fights in here are easy enough, although Roca and Celica will probably get their wires crossed while attacking targets. On the bright side, Roca can do full damage to the annoying Revenants in the area.
The second floor has its stairs right out in the open, but there are a lot of chests scattered around: a Recovery Water (Large), 1500 shillings, a Mercury Stone, two Lendein Grass, and a Cold Talisman. The third floor is more spread out, but is likewise full of stuff: Himekami's Bracelet (Left), a Touch of Elyun, and a Heavenly King Stone. Take the stairs in the northwest corner down to the fourth and final floor. Here, there's nothing of interest aside from the boss in the northeast.
- BOSS: Ermon, Lesser Demon (x2)
- Ermon can take some fairly sizable chunks out of your health, but not to the point that you'll be caught off-guard easily. Roca's attacks do almost nothing against him (hence why she fails if you let her go alone, I guess), so the onus will be on you and your summons to take him apart. Luckily, his defense isn't too strong.
While dismantling the summoning altar, Celica comes across the Tome of the Thunder Angel, which will summon the angel Bardiel to challenge you. Following this, you make preparations to return, but discover that Ermon created a barrier around the room while you fought; the two of you settle down for the night while waiting for it to dissipate. During their conversation Celica mentions that Roca reminds him of another priestess of Marsterria named Clear, who he loved. The next morning Roca hands over the feather, mentioning that it's come from Ilzave; Celica and Haishera recognize the trap at once, but decide that there's nothing else for it but to keep going forward. As Roca and Celica go their separate ways, she thinks to herself that Clear was the name of the holy maiden of Marsterria - but she died decades ago.
The Labyrinth[]
Western Passage, 7F[]
Once you've acquired the feather from Roca one way or the other, it's time to move onward. Warp back to 6F and head through the Infernal Space to the beams that were blocking your progress before. With Ilzav's feather in hand, they dissipate upon your approach, allowing you to continue on down the hallway. You soon come to a room with a stairway, but it's also where Wendice has been cheerfully incinerating demons for quite some time.
She greets you amicably enough, and mentions that she hangs around here because the strong demons give her ample opportunity to practice her magic. Celica replies that he's here to find someone, and she correctly surmises that he's talking about the princess of Rewinia. He tells her that he's not working directly with the other Rewinian soliders she's seen; she's doubtful about his ability to survive, and warns him to stay clear of the pavilion to the east - if he wants to find Latina, he just needs to go down the stairs. As she leaves, Haishera notes that you have no particular reason to trust her, but that the pavilion is indeed populated by demons that would be better avoided. More specifically, random encounters in the pavilion are on par with the more difficult boss fights you'll be facing at this time. There'll be plenty of time to come back later, so head on down the stairs.
Mine, 8F[]
As you enter this newest floor, you cut ahead to an argument between the Rewinian leaders. Ranzov convinces Revia to send Refin ahead of the main force as a scout, to Refin's dismay; she agrees only when Ranzov suggests that she should move ahead smoothly so that Celica doesn't end up cleaning up her mess. Privately, Ranzov confers with one of his followers; they've rearmed the traps behind them to slow Celica's progress, and once Revia's entourage has been reduced a little further, it will be time to strike...
You'll encounter one of the traps in question when you try to head down the hall lined with pillars; spikes will shoot out of the floor, but luckily your reactions are good enough to protect you. The passage to the north leads to a seemingly empty chest - however, this chest conceals the switch which will disable the spikes. Celica will note as he passes by the trap that the mechanism has been tampered with.
Follow the corridor around until it branches off to the south. Down here are a number of chests: 3 Jupiter Stones, a Prenicia Mail, a Touch of Elyun, and a water-base sword called Qilpina. You'll also come across the Comb of Alaina. Haishera quickly tells you that the comb is cursed, possessing those who use it and causing them to offer themselves as blood sacrifices to the god Alaina. Celica resolves to take the comb back to Rewinia with him to be disposed of properly.
A little further up the main drag, you'll come upon an injured Rewinian soldier, who tells you that to protect the lives of her troops, Revia has been sending men back to the surface as they are injured or otherwise incapacitated. He also mentions that she's encamped just ahead. Go to the end and activate the teleportation pedestal (allowing you to start here later), then talk to Revia. She's relieved to hear that her men are making it back safely, but shocked to learn that the traps are apparently rearming themselves behind her. Refin is a bit more suspicious, and asks Celica to return the next day - of all the troops injured in traps so far, none of them were loyal to Ranzov, and something may be up.
This is as far as you can proceed until you return to town and sleep again. At the inn, Celica dreams about a younger and much more cheerful Revia, who wasn't afraid to befriend the Godslayer because he's just another human deep down - or, as she puts it, because the two of them are the same in that respect.
Return to the mine, and you'll see Ranzov finally put his treacherous plan into action. Note that if you do not complete the Ranzov event on the day after you dream about Revia, he will escape, and Revia and Refin will die. Teleport to the 8th floor and pick up where you left off yesterday. With the knight corps in chaos, you're free to move through the previously-obstructed door into the rest of the level. There isn't much to see here, so just follow the passage around - assuming that you didn't dawdle, you'll pass a number of wounded Rewinians on the way, ending with Refin, who tells you that Revia should be further inside. He remains behind to hold off Ranzov's thugs while you proceed further. Ignore the passage heading south (the only thing of interest there is another locked door) and instead make your way east to where Revia is. Ranzov and his goons are almost too absorbed in raping her to notice Celica when he arrives, but they're still able to find their weapons.
- BOSS: Ranzov Kiernan, Wizard, Crony (x5)
- Most of these enemies can probably be killed in one hit, although Ranzov will take a couple. His magic can hit you for around 75 damage, so take him out quickly; other than that, these goons are basically just cannon fodder.
Predictably, Ranzov begs for his life when his men are defeated, but Celica isn't showing any mercy. Back in town, Refin is hospitalized for his severe injuries, while Celica is left to watch over Revia for the night. With the surviving knights all recovering and Revia otherwise indisposed, it now falls solely upon Celica to track down the missing princess. Head back to 8F and continue exploring.
As you proceed through the eighth floor, you'll see another scene in which Abeloos and Ilzave have a chat about the encroaching intruders. Abeloos reveals that the human with divine power is, in fact, the Godslayer; Ilzave's response is unreadable, but she decides that halting Lorrain's advance takes priority at this point.
A little further, and you'll come to where Dorgius is having fun chopping up some of Lorrain's men. He's quite happy to see Celica (assuming you went to the Elf Village), and attacks on sight.
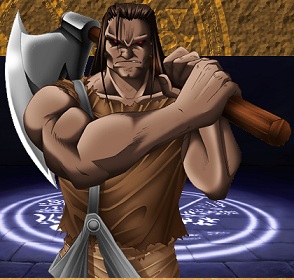
- BOSS: Dorgius, Lv. 10 Torlent Soldier (x2)
- Unfortunately for Dorgius, he's no stronger than back at the Elf Village. Don't get soft, though - the real fight is coming soon.
Dorgius bolts after you beat him this time; when you head down the stairs just behind him, you'll see him approach Abeloos and demand to be made stronger. The wizard hedges for a while, but finally agrees to seal a demon within the berserker's axe to make him stronger - though he warns that it can only be used once.
Mine, 9F[]
The further you go, the less like a mine this place looks. There's not much exploring to be done right now, but make sure you're stocked and have been allocating your experience points, because you've got one whopper of a boss coming up.

Head down the brick hall a little way and you'll find Lue (assuming that you saved her) preparing to get revenge on the people who destroyed her village. She's spying on a meeting between two forces: Abeloos' troops, led by Wendice, and Ilzave's legion of angels. There's some sort of truce between them, although Wendice clearly doesn't trust Ilzave; Ilzave offers Wendice greater power than she can imagine as proof of her trustworthiness, which only insults and angers the sorceress. Before things can degenerate into squabbling, Lorrain teleports into the area. He has the key to the large magical door in the room, but isn't expecting Dorgius to suddenly come surging out of nowhere and knock it from his hand. Seeing the object of her hatred at last, Lue jumps into the fray, and Celica has no real choice but to follow.
Dorgius is even more out-of-control than before, and Celica barely arrives in time to distract him from Lue, who is shocked to learn that Celica is the Godslayer. Haishera observes that the demon within the axe is feeding off of the berserker's soul; Lue and Celica have to stand together against him.
- BOSS: Dorgius, Wizard, LV. 5 Torlent Soldier (x3)
- If you didn't save Lue or pick up any summoning spells before this point, you're in for a world of hurt. Dorgius can do well over 400 points of damage with his axe, which is almost certainly going to be a one-hit kill at this point in the game. Your first order of business is to use a sword technique to raise your defense rating, lowering the incoming damage to survivable (but still very painful) levels. Next, use your strongest summon, which will probably be Irun. Then kill the wizard and focus on keeping your health topped off for the remainder of the fight while your allies do the dirty work. Don't attack Dorgius unless you're sure you'll have time to heal yourself before his next move.
When Dorgius dies (rather messily, at that), Ilzave, Wendice, and Lorrain all realize who's just walked into their midst; Celica and Lue find themselves trapped between three very pissed-off and numerically superior enemies. Thinking fast, he grabs the key Lorrain dropped and uses it to phase through the sealed door, taking Lue with him.
The next room will be very important to you in a little while, but for now Celica is more concerned with getting out. Use the nearby terminal to record your presence so that you can warp here later, then use your earring to beat a hasty retreat. Once back on the surface, Lue will gruffly thank Celica for saving her (for the third time now), and demand that he tell her how she can repay him, since honor dictates that she do so. His request is less surprising than the fact that she agrees. Afterward, the two go their separate ways.
Back in the dungeon, Lorrain has managed to slip through Ilzave and Wendice's clutches, but his forces have been completely wiped out. Their agreement met, Wendice asks about the "power" the angel had mentioned. When Celica goes to bed at the inn, Ilzave will lead Wendice to a room containing a circle of power, which has been collecting the lifeforce of everyone who's died within the mine. However, the angel tells Wendice that she can't use it without being destroyed; when this makes the sorceress angry, Ilzave hints that Abeloos holds an item that will make it possible.
9F, Again[]
In the morning, head back to the mine and take the teleporter to the 9th floor.
This area will be your travel hub for the remainder of the game. The hallway you're now in has several teleporters in the little siderooms branching off of it, all of which bring you to other areas of the dungeon. There are eight in all.
- The one right next to the yellow circle leads to an unexplored section of 4F.
- The northernmost portal on the west side leads to Ermon's Palace (allowing you to get in there and loot the place if you didn't agree to help Roca).
- The remaining three on the west side lead (from north to south) to 12F, 11F, and 10F. On all three floors there's a barrier preventing access to the rest of the map, although the 12F portal does allow you to explore a bit and access a treasure cache.
- The first two along the north wall lead to 6 and 7F; both open into areas you've already cleared.
- The final portal in the upper-right corner leads to the Eastern Pavilion, the area Wendice warned you not to visit back on 7F. However, there's an object blocking the portal on the other side, so you won't be able to use this one until it's been removed.
For the moment, take the first portal to 4F for a quick loot run.
This area has five fixed battles with three Reunsch, which shouldn't be particularly difficult at this stage of the game. Their magic can still hurt, though, so don't be in a hurry to just autobattle through them. At the north end of each side is a Saturn Stone and a Mars Stone. When you've killed all the underlings, head to the middle to fight a boss.
- BOSS: Greater Demon
- This guy has a fair chunk of health, but doesn't hit all that hard - most likely in the 70-80 range.
The chest behind this boss gives you the Pearliza armor. When you're done here, head back to the hallway of portals in 9F.
You need to continue moving deeper into the mine, but none of the portals will let you actually proceed further. The only way to proceed now is on foot - and now that the squabbling armies in the main room are gone, you can safely travel back through the large door and explore the rest of the level. Hallways branch off of the large room to the east and west. Start by heading east. There are some branches here, but nothing major. Heading in a southerly direction will eventually get you an Ogre Card and a Word of Dark Binding. To the east is a Rod of Demon Banishment, which will allow you to enter the Abyssal Space on 6F if you so choose. In the north you can pick up the exceedingly powerful Heal Ring; examining the crystal in the northeast corner will cue a boss fight.
- BOSS: Grashion
- This enemy uses mostly physical attacks, none of which should be too dangerous - keep your health above 100 and you should be fine.
When the boss dies, the crystal shatters. You'll hear the sound of a door opening, but - of course - there's no indication of where. Head back to the main room, and this time go west. Again, some minor branching happens here. Go south first to collect the Lonkreps armor. You'll also find another crystal in the southwest corner, but this one has already been shattered. Moving to the north, you'll find a locked door (soon to be opened) and the stairs down to 10F.
Mine, 10F[]
Heading down the stairs, you're treated to another scene. Abeloos walks in on Wendice as she's rummaging through his chambers. She's found the ring that Ilzave mentioned; when he asks what she thinks she's doing, she retorts that he's been cheating her out of the reward for all the work that she's done - she wants unbeatable power, but she has no desire to end up like Dorgius did. Abeloos tries to explain that Dorgius' lack of intelligence was what turned him into a monster, but Wendice is done talking and teleports out of the area. Abeloos thinks to himself that this is all as the angel planned, and considers it no great loss - there are other young test subjects out there.
This level is far more of a maze than the last. It's divided roughly into three sections; west, east, and central. To proceed to the exit in the center, you'll want to head east from the stairs, then north into the large open area at the top of the map, then head east and back into the maze further over. Before that, though, explore the section you're in now. Way down in the southwest corner is yet another crystal, and this one provokes another fight.
- BOSS: Solgache
- Unlike Grashion, this odd-looking boss hits very hard, and is capable of dishing out 300 damage with two back-to-back attacks. Keep your health topped off at all times, and let your summons do the work for you. Alternately, if you've beefed yourself up a bit, use a fire-based weapon (unlike the other enemies on the floor, this guy - er, girl? - seems weak against it.) You'll get the powerful Seize Lancer for killing it.
Once again, you'll hear a door open as the crystal shatters. Keep exploring; further to the north of this position is a chest containing the Yober Key, which will (finally!) unlock all those gold doors you've been seeing. There's one in the northwest corner of the area, so check it out - it contains two Daggers of the Raging Flame. Also in the area are two Magic Stones.
After you've cleaned out the western area, head north to the large crevasse, then follow it all the way to the east until you come to another gap in the south wall. You'll immediately get another scene upon trying to enter; Wendice has returned to the magic circle and is using Abeloos' ring to channel the power, but soon finds that she simply can't draw any more out. Ilzave tells her that she's reached the limits of a human's capabilities, but promises that there is a way to gain even greater power. Wendice demands to know, and Ilzave, giving a rather creepy smile, agrees.
Keep moving down the tunnel a ways, and you'll soon come to the other end of the magical portal from 9F. Examine the gargoyle to the right of the barrier to shut the field down, opening up a much-needed shortcut to this point. Once you've rested and resupplied, continue down the corridor to the south. The first tunnel branching off to the east leads to still another crystal with a boss hidden inside.
- BOSS: Lenia Nui
- Water-woman has several fairly weak attacks and one very strong attack on a short cooldown, so depending on how your luck goes this could be either very easy or moderately difficult. If you're having trouble, you may want to move ahead and grab a better sword before coming back.
The second eastern tunnel winds around to some stairs, giving you a brief jaunt down to 11F - and from there, back up to 10F again. Stumble through the little mini-maze in the southeast to a chest containing the Parmir sword.
Head back to the main hallway on 10F. From here, head all the way down, then west to the center of the map to meet Wendice. Without any preamble, she seals the door behind you and attacks, hoping to defeat you and take the Godslayer's power for herself.
- BOSS: Wendice Prana, Experimental Super Soldier (x2)
- Wendice's magic is decently strong, but not strong enough to be a threat. The worst you'll have to deal with is roughly 80 HP or so, with long cooldowns between casts.
Realizing that she can't win against you, Wendice uses Abeloos' ring to channel a lot of power - more than she can control, as it turns out, and she soon finds herself in agony from the excess magic surging through her. Celica is forced to intervene, draining the excess power from her safely, and more besides (Haishera comments that it's just like how she and Celica met). Afterward, he reveals to the sorceress that he's put a curse on her that makes her unable to use magic if she tries to harm him. This annoys her greatly, but she accepts it, then asks if Celica intends to fight Abeloos. When Celica says he doesn't particularly care either way, she mentions that he's performing experiments on captive villagers, and gives him a magical crystal that will disable Abeloos' protective barrier, should Celica change his mind. With nothing further to say, she leaves.
A series of four doors seal the hallway to the north, with one connected to each of the large crystals you've seen. You've destroyed three, plus one that was already broken, which means the hallway should now be open. Head on through to the stairs down to the 11th floor (for real this time).
Mine, 11F[]
First things first: from the stairs, head east as far as you can (zigzagging north a couple of times) to deactivate the force field outside of the teleporter room, giving you another shortcut.
Heading all the way west from the teleporter eventually brings you (after going up and down some stairs) to a chest containing the Necklace - a piece of armor, apparently. The stairs south of the teleporter lead up to 10F, then immediately back down again; upon reentering 11F you'll see a scene of a demon named Saulule ordering a naga princess to restrain the Godslayer when he arrives. It seems the lives of her clan depend upon her cooperation.
The passage from the stairs leads north to another crevasse like the one on the floor above; follow it to the west, taking the hallway leading south to more stairs back up to 10F - and then immediately back down to 11F again. The chest just to the west of the 11F stairs contains two Touches of Elyun. Follow the corridor over to the west edge of the map, then south along it to the corner, then east to a gray sealed door. Head north from this door across a narrow bridge to yet another staircase. From here, go south along an equally narrow hallway and take the stairs back down to 11F.
At last, your destination... the naga in this room is Li Quarue, the princess from the earlier cutscene. She tells you that she has no grudge with you, but you must die here - when Celica asks why a servant of the Old Gods is doing Marsterria's bidding, she says that other concerns have become much more important than old grudges. You're given the option of whether or not to fight; she's unable to move and give chase, allowing you to take one of two routes here.
- BOSS: Li Quarue, Flame Naga (x3)
- If you're bloodthirsty, you've got a bit of a tussle on your hands. Li Quarl's swirling fire attack is likely strong enough to take you apart in three hits, if not less, so be quick with those heals when you need them.
Once you've killed her, an image of Saulule appears and mocks her for her weakness. He identifies himself as a faithful servant of Marsterria, but this is all that he intends to do to you for the moment. Before leaving, he taunts Celica, reminding him that as long as he continues to live, people around him will continue to die as sacrifices...
If you go back to that sealed gray door from earlier, you'll find it open.
Or, if killing naga isn't your thing, you can simply walk through the illusionary wall to the south. Saulule himself is hiding in the back room, and clearly did not expect you to find him. He tries to convince you not to attack him; first he tries to tell you the location of Li Quarl's clan, then he tries to get you to fight Li Quarl by promising to tell you her weakness. Celica is unmoved by the demon's efforts to pit him against the naga, and says that Saulule should fight his own battles.
- BOSS: Saulule, Dragontooth (x3)
- Saulule is about as frail as he looks, and should offer no real resistance at this point.
With Saulule dead, Celica begins to destroy the demon's collection of magical books. Haishera stops him before he tosses the last one on the fire; it's the Tome of the Ghost Princess. Go back and talk to Li Quarue. Celica informs him that Saulule is gone; the naga is shocked to learn that Celica not only didn't bother learning her clan's location, but also has no interest in extorting further conditions from her. Saulule's barrier, however, is still in place and prevents her escape. Ilzave bound other creatures within crystals on the floors above in order to keep intruders out, but the naga was too powerful to be bound, and so Saulule settled for simply trapping her in this room. Celica isn't entirely surprised to learn that Saulule was working for Ilzave, but Li Quarue quickly tells him that he has it wrong; Saulule was in the labyrinth to keep Ilzave under observation. He doesn't know what to make of this news, but the naga is more interested in getting out. She offers to become Celica's apostle; her people will get by without her, and given that the pantheon wants to destroy them all, the Godslayer just might be a good ally to have. One sexual ceremony later, Celica has a new summon.
Head back to the sealed gray door from before. It's now open, allowing you to run along the south edge of the map. Grab the Vachadze from the chest along the way, then head down the stairs.
Assuming that Roca is still alive, you'll be treated to another scene here. Ilzave is busy erecting the final barrier, and finally tells Roca that an Old God is sealed away at the deepest point in the mine, and that the Godslayer is likely coming to free it. Asking Roca to prove her loyalty to Marsterria, the angel charges her with killing the Godslayer, telling her to have faith in her own power.
Mine, 12F[]
Right after stepping off the stairs, you'll come to the electrical barrier blocking another one of the portals from 9F. The area behind this barrier is quite a bit bigger than the previous two, so head north. Fight the group of Angels and Archangels to enter a room containing a Touch of Elyun, a Magic Stone, and two Sword Accessories. From here, you can head all the way up to the northeast corner to take a teleporter to (or from) 9F.
From the (now-deactivated) barrier, head down the hall to the west, past a door locked with the Yober Key. In the southwest corner you'll have to fight a crowd of Angels and Archangels to proceed north. Ignore the first passage leading east and continue up into the northwest corner. The little room to the north is empty, but the path leading to the north edge of the pit will give you two Venus Stones and a Touch of Elyun.
When you're ready, head down the eastern path you skipped before, entering the center of the map. Ignoring the sealed door for the moment, take out another pack of Angels and Archangels and head north to meet Ilzave.
If Roca has died, Ilzave will simply attack you after announcing that she can't let you proceed any further. If Roca lives, she will be here as well, and will be shocked to learn that Celica is the Godslayer. Ilzave tells her that the time has come to fulfill her duty. Celica prepares for battle, realizing that their relationship can only end like this - just as a similar relationship ended, years earlier. Roca, however, shocks him by lowering her spear and refusing the command. Ilzave has expected this and promptly blasts her with lightning; Celica runs to where she's fallen, again reminding him of when Clear died thirty years before. Unlike that time, Roca is merely wounded, albeit seriously, and asks with some amusement if Celica had seriously intended to fight her. Ilzave calls Roca an apostate, derisively saying that human passion spits in the face of the gods. For this, divine punishment will strike them down; Roca should rejoice that her death will lead to the death of a follower of the Old Gods.
This doesn't go over well with Astraea. Celica's anger resonates with hers, allowing him to call up part of the power he's lost, diverting the thunderbolt the angel threw at him. He uses the brief advantage to heal Roca and teleport her back to town, then prepares to face off with Ilzave.
- BOSS: Ilzave, Archangel (x4)
- Ilzave can do up to 200 points of damage with her attacks and magic, while the Archangels can do around 50 points each. Use an offensive spell or item to take out all the underlings at once to give you a bit more breathing room.
Celica doesn't waste any time after his victory; he proceeds to rape Ilzave and drain her energy from her; giving her repeated orders to submit, all of which she refuses. Finally, he suggests that he might make her his apostle instead, but rather than seeing this as an insult as he'd expected, she simply tells him to do what he wants - provided that he can break the oath of obedience which Marsterria placed upon her. He does so, and rather than take advantage of her brief freedom, the angel willingly gives herself to him. When he asks why she suddenly chose to submit, she tells him that it's because of her lord's words - not Marsterria, but the Old God who she originally served. When war first broke out between her master and Marsterria, it was suggested that the Old God give its power to humans in order to help in the battle. Ilzave strongly opposed this; if humans were given such power, they would inevitably surpass the gods, which could not be permitted. The plan was abandoned, and Ilzave's master was later defeated and sealed away. Ilzave swore loyalty to Marsterria, because the only alternative for a masterless angel is to become a demon. Now Celica, who has killed a god and claimed divine power, has done just what her master originally suggested. Amused, Ilzave says that she will observe him - and if he does eventually surpass the gods, it will prove that she was correct after all. Haishera remarks that angels are the one type of being that she will never understand, and Celica tiredly agrees.
If you can cast level 6 magic, you will now be able to summon Ilzave to help you in combat. Go back through the earlier sealed door to pick up a Mercury Stone and a Word of Dark Binding, then proceed through the door behind where Ilzave stood and cross the bridge.
As you cross, you see Lorrain and Kachua standing in some kind of castle that clashes completely with the rest of the dungeon. Kachua (at least partially recovered from her ordeal) comments that Ilzave's barrier has disappeared. Lorrain agrees, adding that Celica will be coming shortly. When she asks him what he plans to do, he turns to her and apologizes for getting her wrapped up in all of this. Ignoring her protestations of undying loyalty, he continues that she, at least, must survive, and uses his magic to send her from the labyrinth. This done, he turns to the shadowy woman standing behind him and says that he understands; he then draws his family sword for the first time and places its point against his own throat.
Lorrain was spot-on in his assessment of your progress, because about ten steps later you bump into him standing in the throne room. Lorrain greets Celica politely, but his voice echoes from all around with some kind of dark power. Celica asks about the princess; Lorrain tells him that she lies just beyond, but that the door will not open until he is defeated. Celica demands to know what has happened; why would Lorrain attack his own countrymen? Lorrain commences with his story: eighteen years before, Princess Latina was whisked away to the labyrinth by the wizard Abeloos, who offered her as a sacrifice to revive the Old God sealed within. Whether due to Ilzave's interference or Abeloos' age, the ritual failed. The god remained sealed after absorbing Latina's soul, having gained only a small amount of her power. Yet Latina lived; the ritual involved only a single wound, and when the soul was pulled from her body, the Old God's power kept her flesh healthy and new up to the present day. The Old God continued its efforts to escape, using the princess' ethereal body to gather more power, which eventually drew Lorrain's attention. Learning the truth may have driven Lorrain mad; he dedicated himself to freeing the sealed god - and with it, Latina's soul - and has dedicated the blood of many of his sacrificed men to that cause.
Darkness fills the room, and as Lorrain speaks, he gets a rather dramatic makeover. Now that Celica has come here, he says, the days of waiting are over; Celica's blood will free the old one once and for all. Lorrain has voluntarily taken his own life to be reborn as a demon, as it's the only way that he can defeat the Godslayer in combat. Celica calls him a fool, and Lorrain agrees - but Celica can understand the kind of foolishness that would lead him to die to save a loved one. Confirming that Lorrain has no regrets, Celica draws his sword, and the fight begins.
- BOSS: Dark Lorrain, Ferisn (x2)

- Lorrain's dark magic can dish out quite a beating, and the dogs are stronger than other trash you've met to date, but after Ilzave and her posse of angels, this is nothing you can't handle.
Defeated, Lorrain manages to say his love's name one last time before his body collapses into dust. Celica scoops some of the dust into a pouch for interment; as he does, he makes contact with the last traces of the man's soul, repeating Latina's name over and over. Rather than let it fade away into darkness, he absorbs the soul fragments into himself.
Continue through the throne room to another sealed door. The room to the left is empty, but the one to the right contains - finally - the slab on which Princess Latina lies.
NOTE: This is the point of no return. Once you examine the slab, you will end up in the final dungeon and will not be able to return to town to buy items, check out sidequests, or do anything else. Make sure you're ready!
The princess hasn't aged a day since she disappeared. Celica would like to fulfill Lorrain's last wishes by resctoring her soul, but since neither he nor Haishera can think of anything to do, he resolves to bring her body back to town for the moment. As he lifts her up, her eyes open, and she drives her fingers deep into his stomach - the Old God has taken possession of Latina's body. As Celica's blood flows out of him, his power also flows out, and into the princess. The god taunts him, telling him that even with all of the death and sacrifice that's happened in the mines above, it was his power all along that was necessary to revive her. Celica's consciousness begins to fade, and the remaining fragment of Lorrain's soul causes him to whisper Latina's name. Before she can prevent it, the princess kisses Celica, and the last remnants of her own soul escape into Celica's body. The two stumble apart in shock, and Celica uses the confusion to teleport outside. The Old God lets him go; though she isn't yet at full power, she's still strong enough now to function.
Celica ends lying in the countryside, slowly bleeding to death, and realizing that once she gets free, the Old God will seek revenge on those who confined her - which is to say, most of the population of the surrounding nations. An earthquake begins, and he watches as the buried palace - Vingolv Castle - emerges from the ground and rises up into the air. It's visible from Milphe as well, and Suri knows instinctively that something has gone wrong. Celica loses consciousness and hears Latina's soul speaking to him. She thanks him for saving what remained of Lorrain, and offers herself to him as a source of power - if Lorrain was willing to sacrifice everything to save her, she too must make a sacrifice to make things right. Before disappearing, she asks Celica to forgive Schweltleit, the sealed goddess, saying that he doesn't know the sadness she's suffered. Latina and Lorrain's souls are reunited at last, before spiralling away into nothingness.
Celica awakens once more back in the Bison's Hoof, with an anxious Suri watching over him. They sleep together that night, and while she watches her master sleep, Suri thinks back to when they first met, when he rescued her as a child after her parents were killed. She promises to stay by his side forever.
The next morning, Celica has mostly recovered, and he prepares to depart for the final battle. For the first time in a while (too long, she says), he wields Haishera's sword, and after some consideration, he summons Ilzave and has her carry him to Vingolv Castle.
Vingolv Castle[]
Celica lands at a convenient protruding platform at the west side of the map. Head to the east, then continue heading east at the four-way intersection. Three rooms over here contain chests for you to loot, containing a wealth of items: a Sword Accessory, a Dagger of Raging Flame, a Jupiter Stone, five Large Recovery Waters, two Magic Stones, two Battle Stones, three Touches of Elyun, two Words of Spirits, and a Mercury Stone. Don't forget to equip your Haishera-powered sword and armor, while you're at it. Now go back to the intersection and head south to the stairs; beyond them is the area where you fought Lorrain, but Schweltleite is nowhere to be seen. Note that if you try to use your earring to leave, a barrier will stop you and you'll end up here - fully healed and recharged, thanks to Suri's prayers for your safety. Head up to the second floor.
This area is laid out roughly like a pinwheel, with a twisting passage heading away from the stairs in each of four directions. Three of them include treasure chests: a Magic Stone to the west, a Battle Stone to the south, and a Touch of Elyun to the east. Your eventual goal at the north end of the map, accessible from the northern hallway - but the corridor it leads to is blocked by four sealed doors. To get those doors open, you'll need to go up four separate staircases to the third floor, one located in each branch of the pinwheel at the corners of the map, and fight a group of valkyries at the top of each:
- BOSS: Fespenire (x3), Ferisn (random)
- These super-powered valkyr aren't too dangerous (and you may have already met a couple while walking around), but they can still take a bite out of your health, even with high stats. Keep an eye on your health if you're autobattling, but otherwise there shouldn't be too much trouble.
When each group is defeated, one of the four doors will open. When all four groups have been defeated, head to the north-central staircase on the second floor and climb up. All four of the obstructing doors should now be open, so head down the hall to the south and up the stairs there to the fourth floor.
Schweltleite is waiting for Celica at the castle's top level, and he recalls that she is not an Old God herself - merely a servant of one. She asks what he thinks of the castle, and he responds by asking whether his power was what made it all possible. She confirms, adding that many powers were combined to break the seal - her own; Ilzave, sent to guard her; Abeloos, come seeking the secret of immortality; Latina, kidnapped by Abeloos, and Lorrain, come to rescue her; and all the demons Abeloos summoned. These powers were merely priming the pump, so to speak - it was the arrival of Celica and the Rewinian soldiers, and the subsequent chaos and bloodshed, that set her free. All the dead soldiers prayed for Schweltleite's release, because their souls were trapped within the circle Wendice tried to use against Celica, prevented from ever escaping the mine. Celica asks what she intends to do now, since the answer will affect whether or not they must fight, and he has no particular interest in sealing her away again. Schweltleite replies that naturally, she must seek bloody revenge against the humans who confined her. Celica and Haishera can both tell at once that she's lying, but she seems to be intent on a fight.
- BOSS: Schweltleite
- This is it - the final battle. Schweltleite can attack as quickly as Celica, if not faster, and can dish out 300 HP hits even if you're well-geared. Don't take chances; it's not like you'll need the spells and items for later. The good news is that she won't take many hits to go down, especially if you have the upgraded Haishera sword or got a weapon off of one of the valkyries in the castle. Keep your health topped off at all times, biding your time to attack until she briefly lets her guard down, and you'll be fine.
Schweltleite accepts her defeat. Saying that it's appropriate for a servant of the gods to fall to the Godslayer, she asks him to finish her off. This was the real reason she broke free; she wants to die in battle with a weapon in her hand, not be sealed away for eternity. When her god and fellow apostles went to war, she was kept from the battlefield and ordered to guard this castle, where the Old Gods' sacred apples of immortality were kept. When her pantheon lost the war, there was nobody left for whom to protect the apples - and yet she was still trapped here.
Hearing this, Celica refuses her request; though neither one of them knows why, Latina wanted him to forgive her, and so she will be sealed away again. He tells her that some members of the pantheon must still be alive; after all, he managed to meet one. Schweltleite finds this amusing for some reason, but agrees to continue her vigil, whether it lasts another thousand years or longer - and that if nothing else, she expects him to come back and release her from her obligation in the end. As the castle sinks into the sea to resume its rest, Celica flies away to be reunited with Suri.
That's it - enjoy the ending CGs!
Inn / Town Events[]
Day 1: General meet-and-greet in town.
Night 1: Dream about Alicia's capture.
Day 2: Attempting to organize the search for Alicia.
Night 2: If you haven't rescued Alicia yet, Suri reminds you about her before you sleep.
Night 3: Suri sleeps with Celica.
Day 4: Roca arrives at the Bison's Hoof; she and Celica meet.
- You notice a griffin flying overhead as you approach the mine.
Day 5: Chat with Carla in the town square; Celica has a vision of the elf village under attack.
Night 5: Dream about the caravan under attack by bandits, and Lakche's decision to serve as a decoy.
Day 6: Rinsha mentions that the caravan has come to town.
Night 6: Abeloos notices Celica's presence, but is surprised to find how weak he is.
After this, you must wait until after the festival. The remaining events do not necessarily occur on a set schedule.
Day: Mystradie notices Celica as he leaves the inn.
Night: It's raining; this always puts Celica in a melancholy mood, and he thinks about when he rescued Suri after her hometown was destroyed, on a rainy night like this one.
The following events will only occur if Rinsha is still alive and at the inn.
Day: As he heads to his room, Celica overhears Rinsha seducing one of the town officials in order to get a license to serve alcohol at the inn.
Day: Mystradie sneaks into Celica's room and pokes around.
Day: Mystradie sneaks into Celica's room again and is discovered by Suri; she pushes Suri down and proceeds to have his way with her until Celica bursts in to the rescue.
Day: As you leave town, Saria goes out on an errand for Rinsha, but ends up in a trap hatched by the perverted moneylender Rudonne. When he gets home, Celica hunts Rudonne down and rescues her.
Side Quests[]
The Elf Village[]
On the morning of the fifth day in town, Carla will be hanging out in the town square. She'll strike up a conversation with you, but Celica will have a sudden vision of a village being attacked to the west. When questioned, Carla will tell you that there's an elven village in the western forest, but that they almost never have contact with humans and prefer it that way.
You have two days to respond to this vision by investigating the village; if you don't go until after the scene with Abeloos on the sixth night, you'll arrive to find the village razed and the entire population slaughtered.
Shortly after entering, you'll see a scene where Wendice chews Dorgius out for going on a rampage against their orders; Dorgius is unfazed, saying that he was told to do whatever he wished. As he heads off to continue with the massacre, an elf warrior attacks; Wendice paralyzes his body rather than killing him.
Move along the path; the branches lead to two Recovery Waters (Large), a Cold Talisman, a Flame Talisman, and a Magic Stone. In the clearing at the northeast corner Celica will stop and take stock of the destruction before continuing. The chests in the clearing contain a Liera Leaf, a Recovery Water (Small).
As you move out of the clearing, you'll come across a group of humans assaulting an elf girl, preparing to add her to their collection of captives. One of them mentions that Abeloos needs the blood of the living to prevent himself from aging further; Celica recognizes the name as that of the court magician of Edicain, who vanished ten years earlier. He steps in to help, resulting in a fight with a Brigand and a Thief. The girl is still terrified of her human rescuer, but points the way to where the main force of invaders can be found.
The chests after this contain a Mars Stone and a Venus Stone. Finally, at a small clearing in the middle of the map, you'll come to the main body of the attacking force and a cornered elf warrior. Their leader, Dorgius, goes berserk when you intervene.
- BOSS: Dorgius, Lv. 5 Torlent Soldier x2
- The mighty berserker Dorgius is barely more powerful than his underlings, and you can probably auto-battle through this fight without fear. The next time won't be so easy, however...
Dorgius goes completely out-of-control and flees following his defeat (odd behavior for berserkers, who typically fight to the death); another group of three soldiers will mount a last-ditch effort to stop you. Once they're all dead, there's a short conversation with the elf warrior Lou. She remains distrustful of Celica, but does tell him that the attackers came from the abandoned mine. She heads off to help the other survivors, and is later surprised to hear that Celica saved them as well.
After you exit the forest, there's another scene where Dorgius reports to Abeloos that his failure was due to a red-haired woman. Abeloos has heard reports that someone of that description came to town with the Rewinian soldiers...
The Caravan / Springtime Pass[]
When you go to sleep on your fifth night in town, Celica will have another dream. This time, he sees a caravan fleeing from bandits. It looks as though they're surrounded, but Lakche, one of the young dancers, abruptly hops off the wagon and runs off into the forest to serve as a decoy.
The next morning, Rinsha will mention that a caravan with beautiful dancers has just arrived in town after some trouble with bandits. If you go to the caravan in the town square, you'll walk into an argument between Niu and the leader of the troupe about whether to go looking for Lakche - apparently the local militia can't spare the forces from those already assigned to defend the town.
At this point you can go to the Springtime Pass, due north of town, to try and rescue Lakche. It must be done before the end of the day; otherwise, Carla will inform you that the caravan has departed, and Lakche will be nowhere to be found. The pass itself is quite easy, with no enemies stronger than those you'll meet on the third floor of the mines, which you should have reached by now.
Scattered about the pass are a few items: a Mercury Stone and three Recovery Waters (Large).

Lakche is sleeping in the northwest corner of the map. The bandits finally track her down just as you find her; they're none too pleased at letting the caravan go in favor of chasing a little girl, and they're even less pleased when they realize that Celica isn't a woman. A battle with five Thieves ensues. After you've dealt with them, you're free to take Lakche and head back to town.
If you go back to the caravan and talk to the people there, Lakche will come to visit Celica in his room that night; the caravan will now remain in town for the rest of the game.
Orvid's Palace[]
The staircase in the northwest corner of Level 6 leads to an optional sidequest that will give Celica the first of his summoning abilities.
Head east upon reaching the seventh floor. The chest here contains Ables, the Demon Vessel, a powerful weapon. Once you have the sword in hand, head back to the intersection and go south; you'll soon encounter a scene where one of Lorrain's men is charmed and has his strength drained by a young demon, who flees as Celica arrives. A bit further down the hall, you see the demon girl Liliem reporting back to her master Orvid with the energy she's collected; before Orvid can "reward" her, he detects an intruder and sends her to investigate. Follow the path around the outer edge of the purple structure to some stairs leading down.
No sooner do you step off the stairs then you detect Liliem spying on you. She's rather straightforward about telling you that her job is to drain men of their vitality, then realizes that she's said too much; she's surprised when Celica decides to simply let her go. Move around to the west side of the purple structure, where you can find an entrance (the tunnels on the west side of the map have a Touch of Elyun). Move on down the hall and past some strange statues to yet another scene. Orvid orders Liliem to drain the intruder of his vitality; she reluctantly agrees, but is no better at hiding now than she was before. Undeterred, she tries to drain Celica; however, Celica soon turns the tables and drains her instead. She begs for her life, and Celica agrees to spare her on the condition that she become his servant. Liliem informs him that this isn't possible, as she already has a contract with Orvid. Celica instead places a temporary binding on her.
If you follow the hallway up and around, you'll come to a sealed door; Liliem tells you that you have to make all the statues face the same direction. Investigate each of the four statues in the nearby rooms and turn them until they're facing northwest (the same direction as the statues in the southern hallway). Head through the now-open door and take the stairs up to Orvid's inner sanctum.
There are a number of chests on this level, but most of them are behind locked doors. (The one chest behind an unlocked door leads to a Saturn Stone.) At the area's center is Orvid, who wastes no time in attacking you:
- BOSS: Orvid, Hosrog x2
- Like Kachua, Orvid can dish out large amounts of damage (upwards of 90 points) before you have any chance to react, so be sure to keep your health high at all times. Otherwise, he's a fairly straightforward fight.
Once Orvid fades away, Celica burns Liliem's old contract and forms a new one of his own. Assuming that you can use Level 3 magic, you can now summon Liliem to assist you in combat.
Two of the chests behind Orvid contain a Jupiter Stone and a Sea King Stone; the third chest contains the Tome of the Mad Marquis; according to Haishera, this book is a guide to summoning a powerful demon. If you're able to subdue the demon afterward, you may be able to bend it to your will.
Summoning Irun[]
Once you've retrieved the Tome of the Mad Marquis from Orvid's Palace, you have the option of summoning the demon described within. To do this, go to the Milphe town square and choose to investigate the back alleys; once you've confirmed your intentions, the summoning will begin.
- BOSS: Irun
- Irun hits a bit harder than Orvid did, and despite having less health, he also takes much less damage from your attacks. It's going to be a long slog to wear him down, unless you summon Liliem, who (oddly) can kill him in one 999 HP hit with her Neko Punch.
Assuming you can use Level 4 magic, Irun will be summonable in combat from this point onward.
The Corrupted Temple[]
When you come back to the Bison's Hoof after picking up Alaina's Comb from the eight floor of the mine, Celica will hand it over to Suri for safekeeping until it can be properly disposed of. At some point after that, Rinsha will go into your room to clean up; coming across the comb, she decides to try using it herself, goes into an odd trance, and marches right out of town. The next time you return, Suri will be in a panic; as Haishera tells you, people possessed by Alaina will travel to a place sacred to her and offer themselves as human sacrifices. You have until the coming night to rescue Rinsha, or else she will end up the same way (and then Suri will be sad for the rest of the game).
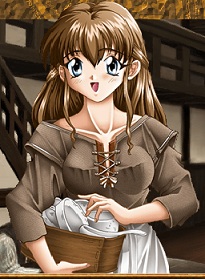
Go to the militia headquarters and talk to Carla; she'll remember a nearby temple of heretics which they cleaned out some time earlier, and draws you a map to show the ruins' location - at the world map's northeast corner. This should be a short, simple dungeon, but since you don't get to rest up in the middle, make sure you're stocked with supplies before you go. There are Revenants here, so go in with a non-Physical weapon like the Viral Sword.
The first floor has a couple of chests, but they're both behind doors sealed with "some mysterious power." Your eventual destination is the double-staircase at the north side of the map, but you'll soon run into another door that is similarly sealed. Take one of the earlier staircases up and see what you can see.
Turns out it's more of the same on the second floor; each staircase leads right up to a sealed door with a demon behind it. Corridors running to the north and south on each side lead to a button. When both buttons are pressed, the door on that side will open and lead you to a fight with a mix of demons and undead. Note that if the Revenants all decide to use magic, they can kill you very quickly, so don't think you can just auto-battle through these. If you stay on your toes, however, there's nothing to worry about. Repeat the process on the other side, and you'll see the doors in the central hallway on the second floor open up. Head down to the north end of the first floor, then up to rescue Rinsha.
Assuming you didn't get there too late (in which case you just find blood and scraps of clothing), you'll arrive just in time to pull the comb out of Rinsha's hair and bring her back to her senses. Before you can leave, though, the being who had been controlling her manifests in a last-ditch attempt to claim its sacrifice.
- BOSS: Vile Priest Heltmeit, Kurlaug, Revenant
- With three magic users here, you'll be taking a lot of damage at the start, so whittle down those numbers quickly. Heltmeit is much less threatening when he's by himself, although he does have a good chunk of health, so you'll need to heal up a few times.
Once you're done here, you're free to go - but Heltmeit's defeat has finally opened those doors on the first floor, giving you access to a Venus Stone and Dinya the Thunderbolt, a sword that does lightning damage. Going home will bring the expected tearful reunion, followed by a late-night visit from Rinsha when you go to bed.
Carla's Request[]
One morning, Rinsha will tell you that Carla has come to see you. The swordswoman tells you that she needs a favor; she wants you to accompany her into the mountains to be her witness as she kills a firedrake, earning the title of Dragonslayer. Celica points out that this is a pretty rash thing for a lone warrior to try; she retorts that everybody else is too scared to help - and that if they wait any longer, the dragon may well rouse itself and attack the town. You're given the option of going with her or refusing. Unlike most similar events in the game, Carla doesn't run off and get herself killed if you don't help her; she merely leaves disappointed, and you can go find her and agree to help her later. You can also refuse, then go to the mountain and kill the dragon without her; if you do this, Carla will be extremely pissed at you upon your return and will not speak with you for the rest of the game.
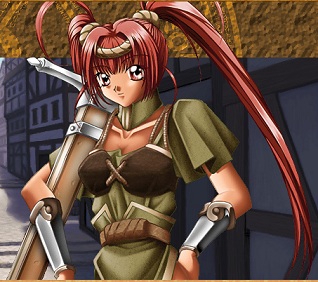
With or without Carla in tow, head to the new map location in the southwest. Follow the path along to the east until it forks to the north and south; take the north branch across the river of lava. The second path leading off the the left eventually brings you to a chest with the Anatos sword; there's nothing else of interest here except for the dragon's lair in the northeast corner.
- BOSS: Fire Dragon
- This guy has a breath attack which does a lot of damage, and a slow clawing attack which does relatively little damage. In either case, you have ample time to react and heal yourself - which is a good thing, since Carla frankly isn't contributing much. You get a Vermilion Knife upon slaying the dragon.
The chests behind the dragon contain three Heavenly King Stones and three Jupiter Stones. On the way back to town, an overjoyed Carla will insist on giving Celica some kind of payment; he passes on the money she offers in favor of his usual request.
The Yober Key[]
Once you've reached the tenth level of the mines and gotten your hands on the Yober Key, you'll be able to unlock the assorted golden doors scattered throughout the dungeon.
- Mine, 6F: Marstia
- Infernal Space, 7F: Meltina
- Infernal Space, 10F: Magic Stone (x5), Battle Stone (x5)
- Mine, 9F: Marwen's Ring, Prenicia Sword
- Mine, 10F: Dagger of the Raging Flame (x2)
- Eastern Pavilion, 6F: Laprix, Heavenly King Stone
- Mine, 12F: Dagger of the Raging Flame
The Abyssal Space[]
Once you've picked up the Rod of Demon Banishment from the ninth floor of the mines, you can enter this optional area for some powerful armor. Warp to the 6th floor from the entrance, then head for the stairs in the northeast corner to climb up into the Abyssal Space. Be warned that the random encounters in here can be quite nasty if you run into the dreaded Raumacarl, which are stronger than most bosses. Fortunately (or not, depending on your point of view), the Abyssal Space is a hellish maze of teleporters followed by a gauntlet of fixed encounters, and between the two of these, there won't be much time for random battles to happen. If you do run into additional Raumacarl, pray that one of them drops the mighty Valsword, one of the strongest weapons in the game.
When you enter, there will be a teleport accessible nearby. Enter it, and then:
- Take the portal to the west,
- Take the portal to the north (the only option),
- Take the portal to the south to reach chest containing two Touches of Elyun
From the now-empty chest:
- Take the portal to the north,
- Take the portal to the west to a room with two Magic Stones,
- Take the portal in the middle of the room (the only option) back to the first chest,
- Take the portal to the south,
- Take the portal to the west,
- Go north and east to the only portal in the area,
- Follow the long winding hallway north and take the portal there,
- Head south and take the portal there,
- Head south again and take the portal there,
- Take the lone portal in this large room,
- And head east across the bridge to fight a boss (the portal in the other direction brings you back to the entrance).
- BOSS: Raumacarl, Kurlaug
- Raumacarl hit hard and often, but their magic is thankfully not too powerful. Depending on your defense, you'll either want to pick them apart yourself or focus on healing yourself while a summon does the work.
Head up the stairs beyond the fallen fallen angel and keep moving. As you step onto the next bridge, an unseen voice demands to know who trespasses in its sanctum. It identifies itself is Vi Rigeil; Haishera recognizes the name as that of a dark magician who transformed himself into a demon. Ignore his warning of eternal torment and keep marching across the bridge to another Raumacarl. A few steps further is a fight with a Greater Demon, a Hellhound, and a Kurlaug. Another few steps, and fight a Kurlaug, Succubus, and Hellhound. A little beyond that, fight two Daelauk and a Gorgonauer.
- BOSS: Gorgonauer, Daelauk (x2)
- Compared to the Raumacarl you've already had to fight, this guy is almost laughably weak. He may even go down after a single strike.
After that rather questionable "boss" fight, cross the next bridge. At the end of a room full of gargoyles is yet another Raumacarl, this time accompanied by two Kurlaug. Cross the bridge south to a little island; snag the Touch of Elyun from the chest before continuing west and north to fight the boss.
- BOSS: Vi Rigeil, Daelauk (x2)
- This guy uses some pretty powerful magic (in the area of 150 damage or so), but has generous cooldowns, which gives you lots of opportunity to heal up in between attacks.
There's no fanfare upon defeating the demon magician. The chests behind him contain 5 Sage Cards, a Mercury Stone, and the coveted Eushully Terepa. Pat yourself on the back; you're officially done with the Abyssal Space.
The Eastern Pavilion[]
Once you've defeated Wendice on the 10th floor and received the Unraveling Crystal, you're ready to go back to the area she warned you not to visit much earlier in the game. From the teleportation hub on 9F, warp to the sixth floor and head to the exit on the east edge of the map. After moving through a long and featureless hallway, you'll find yourself at the Eastern Pavilion, home base of Abeloos and his forces.
A series of doors at the east end of the map will prevent you from proceeding further without pushing the assorted buttons throughout the level. The first is down the passage to your north as you enter the pavilion. Following the next path branching off into the southwest corner will bring you to the second (snagging a Heavenly King Stone along the way). Head south at the next fork for a third. You'll pass the fourth and final switch just as you reach the large crevasse to the east. The stairs leading to the next level are in the center; however, before taking them, take the rope bridge across the gap. Grab the Mars Stone as you make your way to the red crystal in the northeast which powers Abeloos' barrier; using the crystal Wendice gave you, destroy it. Once that's done, go back and take the stairs to the second level.
A short ways into the next floor, you'll go by one of the brown doors you've seen by the other green teleportation circles. Go inside and look at the gargoyle to smash it, revealing the circle underneath - you can now take a shortcut from the hub on the 9th floor to get back here quickly. A little further in you'll fight two Experimental Super Soldiers, then enter what appears to be a barracks. One of the bunks (guarded by two more Super Soldiers) has a Heavenly King Stone. The little storeroom in the southwest has a Touch of Elyun and five Recovery Waters (Large). The gray metal door (with still more Super Soldiers guarding it) hides a Hand of the Great God. When you're finished looting, head up the hall to the northwest corner, where you'll have to face a gauntlet of statues which will attack unless you've destroyed the crystal on the previous floor. Following that hallway, the path branches several times; one of the western branches has a Jupiter Stone, while going northeast and crossing the crevasse will apparently bring you to Wendice's quarters, where you can find a Word of Dark Binding and a hot spring, complete with a sign warning Dorgius to stay far away. Once you're finished gathering up supplies, take the nearby stairs up to the last floor.
There's not much to see here - just a short, curving corridor leading (at last) to the wizard's sanctum. Abeloos remarks that it's been a long time since you last met, though he suspects you wouldn't remember by now. His jealousy of Celica's eternal youth and power has kept him going all this time. The wizard readily confesses to having kidnapped Princess Latina eighteen years earlier, but adds that his attempted sacrifice was foiled by Lorrain's interference, and that he's been fighting with Ilzave ever since. His composure slips away when he realizes that you've dispelled his defenses; screaming that he isn't dead yet, he attacks.
- BOSS: Abeloos Casserly, Experimental Super Soldier (x4)
- Abeloos has some very powerful magic with a very short cooldown; you'll want to focus on him first, and use magic rather than items to heal yourself. Luckily, he's about as frail as he looks, so it shouldn't take many hits to carve through his health pool.
- On the other hand, if you didn't destroy Abeloos' power crystal as you entered, his cooldowns will be even shorter - so short, in fact, that he can easily take you from full health to zero before you can land a single attack. Attacks seem not to do any damage to him in this state either; he may well be unbeatable.
Abeloos dies, oddly, with a smile on his face. Haishera comments that your time together has been an unending stream of battles with enemies like him, but adds that she, at least, will be right there with you - a fact for which Celica is deeply grateful.
The chest in the next room contains the Dark Sword Grenia, while the room beyond contains the last of Abeloos' captive test subjects - a little girl from town named Prill. She's sobbing over the body of a black cat, apparently Abeloos' familiar, but she perks up a bit when Celica shows her that the cat's still alive. Since she's completely filthy after her time in the cage, Celica resolves to bring her down to the (rather conveniently placed) hot spring for a bath before returning her home. Head back down to the next level. As Celica descends the stairs, he discovers that his pack is heavier. One of Abeloos' books, the Tome of the Arch-Demon, has mysteriously appeared in his possession. Continue along to Wendice's not-so-private hot spring, and after some time spent splashing around, you can warp back to town and return Prill to her mother.
The Worm Attack[]
Late in the game (most likely after defeating Ilzave on the 12th floor), resting in town may cause this event to happen. Celica awakes the next morning to hear a great commotion outside; giant worms are erupting from the ground and attacking the villagers. Not one to stand idle while others are in danger, Celica leaps out of his window to fight them off (an easy battle with five Worms), then heads out into the town square to survey the chaos. Most of the services (except for Groc, oddly) are struggling to deal with the current earthquakes. You will be unable to leave town until you've resolved this by going down into the worms' lair and putting a stop to the problem. When you choose to descend below ground, Suri comes running in her travel clothes and insists on coming with you; after a brief staring match, Celica gives in and agrees.
The worm tunnels are a sprawling network of hallways, filled with worm eggs which will hatch if you stand too close. Your goal is in the northeast corner; however, you'll have to head west from your starting point, then loop all the way down, across the bottom of the map, and then back up to reach it. There is absolutely nothing else down here, so there's little reason to dally around and explore. When you finally reach your destination you find the bugs' queen, oddly mutated and incensed by the emanations from below the mine.
- BOSS: Queen Crawler
- Like the rest of this event, the boss fight is quite easy at this stage of the game. Her only ability of note is her magic attack, which does about 80 points of damage.
The sparkly objects on the ground behind her are a Dagger of the Raging Flame, a Mars Stone, Mechuka's Smile, and 10,000 shillings. When you leave the tunnels, you take some ribbing from both Carla and Rinsha about your bedraggled appearance and what you might have been doing with Suri down in that hole, but both recognize what you've done. You're now free to leave the town again.
Summoning Bardiel[]
Assuming that you help Roca to clear out Ermon's Palace, you'll find the Tome of the Thunder Angel when you're finished. Like the Tome of the Mad Marquis, this can be used in the back alleys to summon an enemy who you'll have to fight; unlike that earlier book, however, Haishera will warn you that this one is extremely dangerous. She's not exaggerating, either; you'll want to wait until you've reached at least the tenth floor or the mine before attempting to defeat Bardiel. In order to survive his attacks, you'll want at least 400 HP; in order to damage him, you'll want an attack counter of at least 10 and (preferably) a sword dealing Dark damage. When you think you're ready, head to the back streets and read the tome.
- BOSS: High Angel Bardiel
- Bardiel's attacks are quite painful, and he can instantly follow up a physical strike with a lightning bolt doing roughly 180 damage. The only summon who's likely to make much of a dent in him is Liliem, with her Super Neko Punch attack; otherwise, you'd best go in with a considerable store of magic, as you'll often find yourself needing to recover nearly all your health in-between making attacks on the boss.
Once you take the big boy down, you'll learn the Invocation of Bardiel, an extremely powerful offensive spell.
Summoning Lizaila[]
After you've gotten the Tome of the Ghost Princess from Saulule's corpse on the eleventh floor, you can head to the back alleys in town and try to subdue the princess.
- BOSS: Ghost Princess Lizaila
- This fight will be an exercise in frustration. Lizaila has a spell that can take off 300 health, easily; however, of greater concern is her Sonic Breath attack, which can do up to 800 damage if it connects, almost certainly killing you in one hit. You could grind a high Consitution score to try and endure her attacks; it might be more expedient to get a high attack counter (15 or so) and try to take her down before she uses Sonic Breath. With the right weapon, it'll only take about five or six hits. Sonic Breath has a very long charge-up time, so if you've gotten a couple of hits in and see her start using it, unload on her and try to finish her off before she's done charging.
When you've beaten Lizaila, you gain the ability to summon her in combat.
Summoning Murmur[]
Once you've taken the Tome of the Arch-Demon from Abeloos' inner sanctum and returned to the city, you gain the ability to summon one last super-boss, and it's a doozy. You'll want a defense counter of at least 8, and using a Rod of Concealing Mist probably couldn't hurt, either. Once you're ready, head to the back streets, wave off Haishera's customary warning, and party.
- BOSS: Murmur, Archduke of Hell
- While he's much less random in his super-ness than Lizaila was (unless he gets a lucky critical hit), Murmur can still hit plenty hard enough to ruin your day. Assuming you have over 500 health by now, you'll have to struggle to get your hits in while keeping yourself topped off - any less and he has a good chance of killing you in the next round. Go in with a few Touches of Elyun; take things slow and steady and you should be fine.
When you've beaten Murmur, you gain the Invocation of Murmur spell, which does obscene damage to an individual target.
| |||||||||||||||||||||||||||||||||||||